Step 5: Settings
Name the deal, schedule when it runs, set its priority, and — once it's live — A/B test designs.
Basics
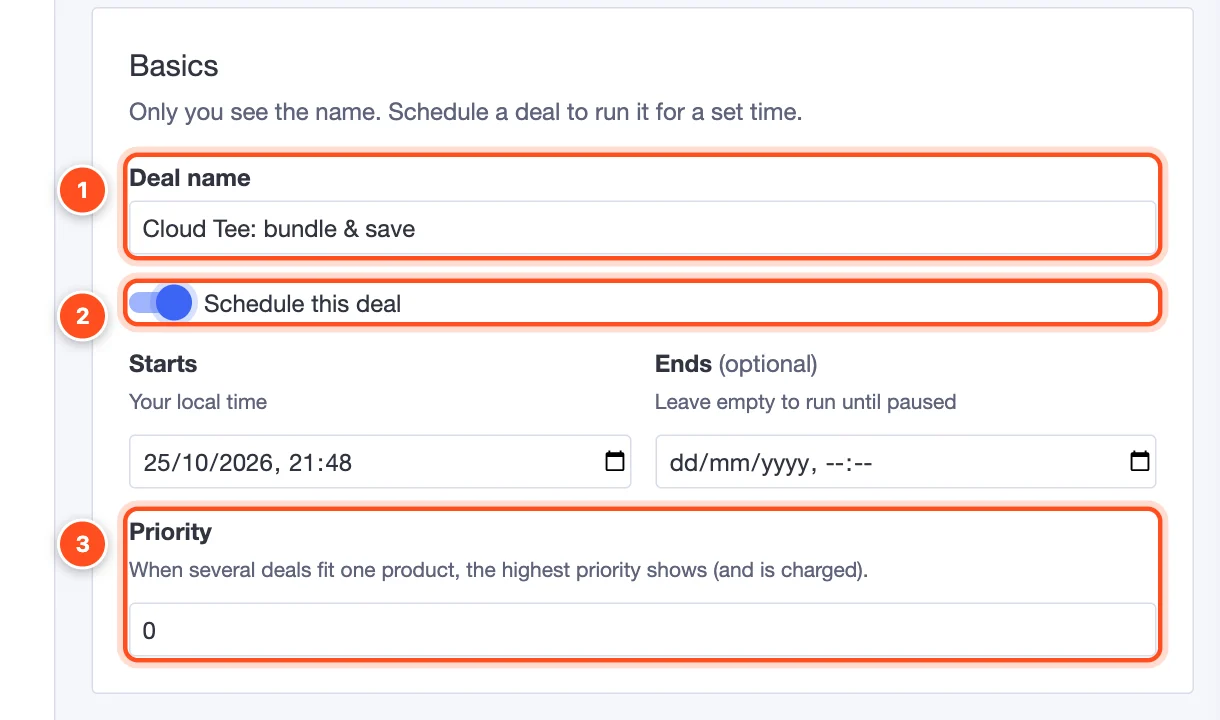
Deal name — only you see it, in the app and in Analytics. Use something you'll recognise, like "Tees — summer 3-pack".
Schedule this deal — turn on to run the deal for a set time:
- Starts — when it goes live, in your local time.
- Ends — when it stops. Leave empty to run until you pause it.
A published deal with a future start shows as Scheduled; it goes live by itself at the start time and ends by itself at the end time (shown as Ended). Perfect for Black Friday or a weekend sale — set it up in advance and forget about it.
Priority — when several deals of the same kind fit one product, the one with the highest priority shows (and is charged). Leave it at 0 unless you have overlapping deals. A typical use: give a Black Friday deal priority 10 so it temporarily wins over your everyday deal on the same products.
A/B testing
Once the deal is published, the A/B test section appears here. It lets you show shoppers different designs of the same deal and keep the one that sells more. See A/B testing for the full guide.
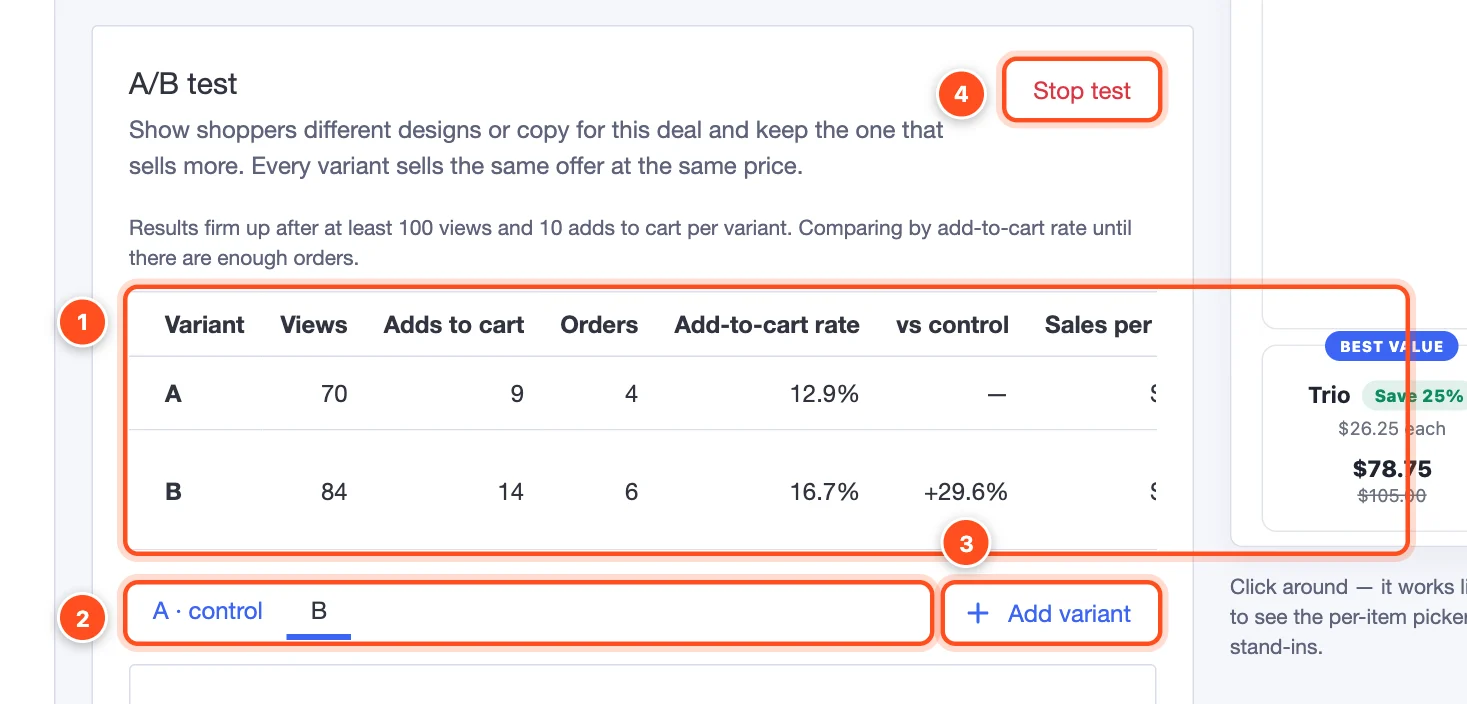
- Results for each variant so far.
- Variant tabs — A is your deal's own design (the control); B, C and D are the alternatives.
- Add variant — up to four variants in total.
- Stop test — every shopper goes back to the deal's own design. Results stay in Analytics.