Step 4: Design
Pick one of 16 ready-made styles, then fine-tune layout, colors, fonts, badges, urgency and every word shoppers see.
The Design step changes how the widget looks and what it says. Every change shows in the live preview straight away, and nothing reaches your store until you save.
Tip: Want every new deal to start with your brand's look? Set a default design once in Settings → Widget.
Styles
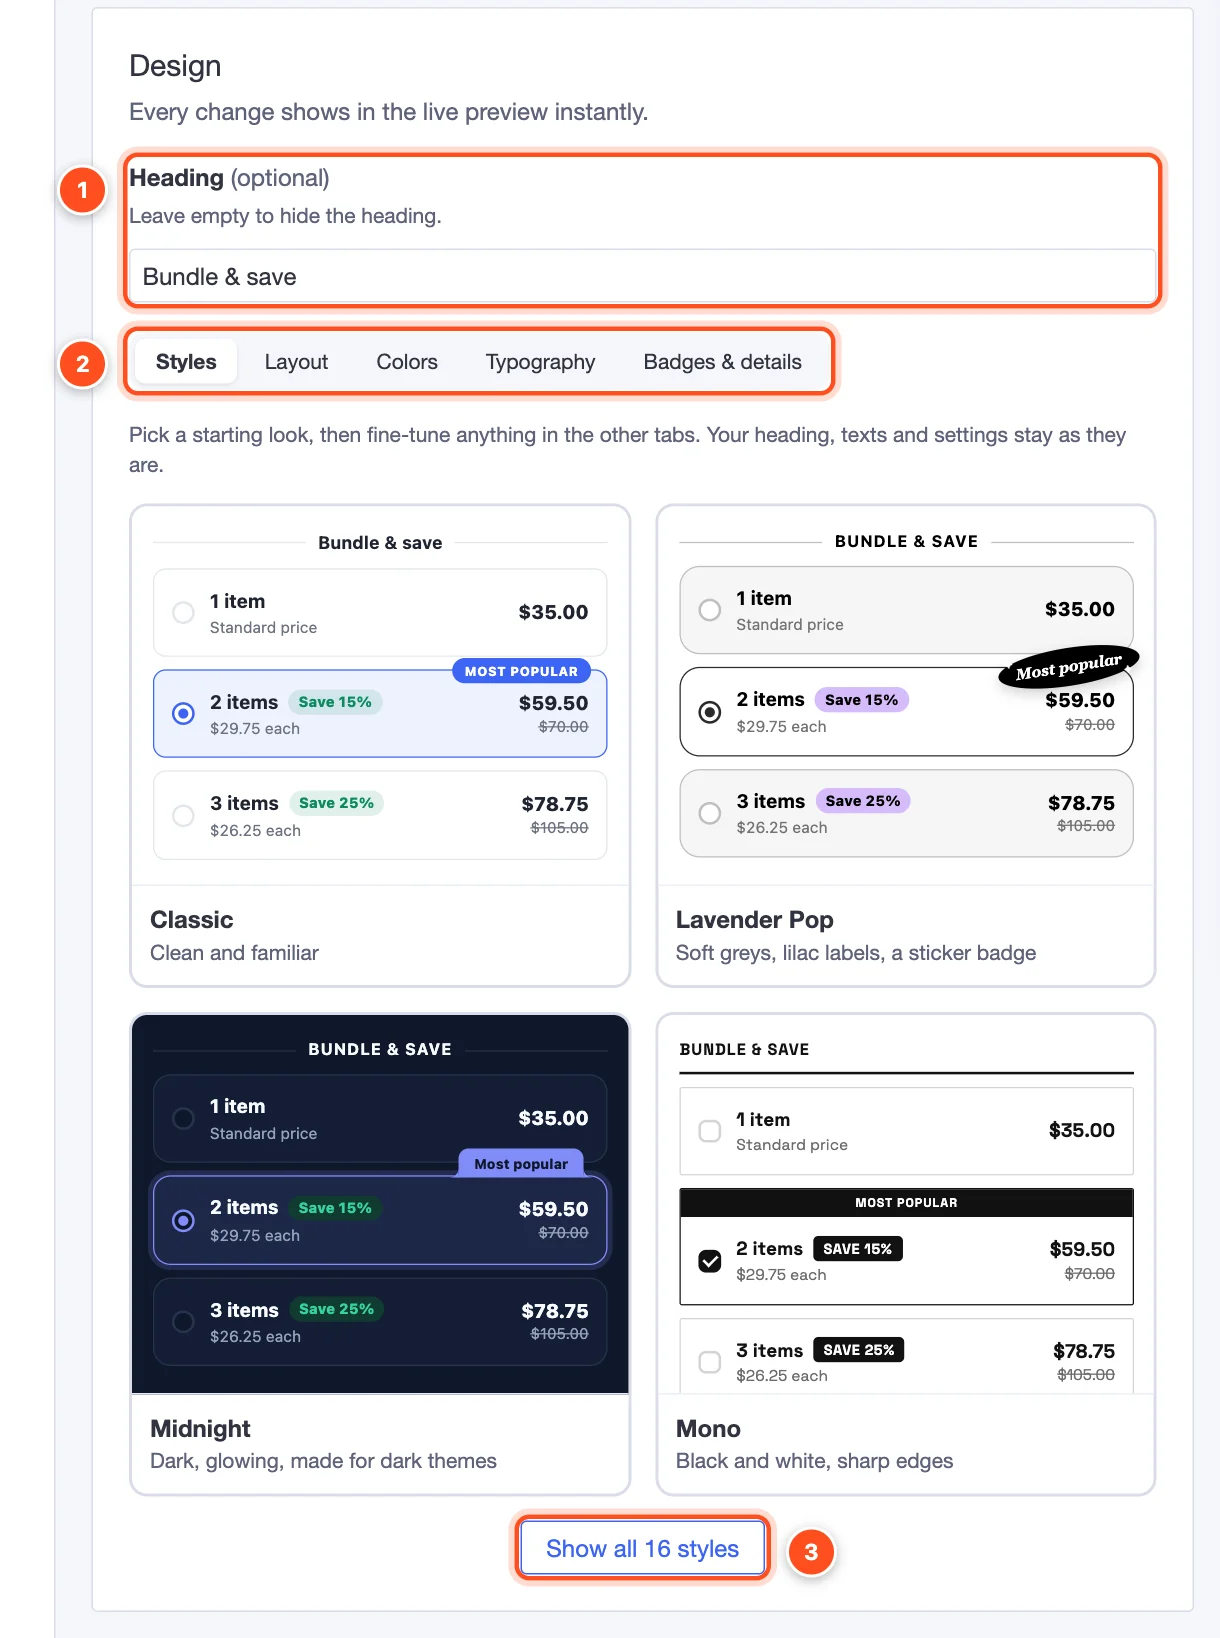
- Heading — the title above the tiers, "Bundle & save" by default. Leave it empty to hide it.
- Design tabs — Styles, Layout, Colors, Typography and Badges & details.
- Show all 16 styles — the gallery shows four to start with. Click any style to apply it. A style changes only the look: your heading, texts and settings stay as they are.
Not quite right? Pick the closest style, then adjust it in the other tabs.
Layout
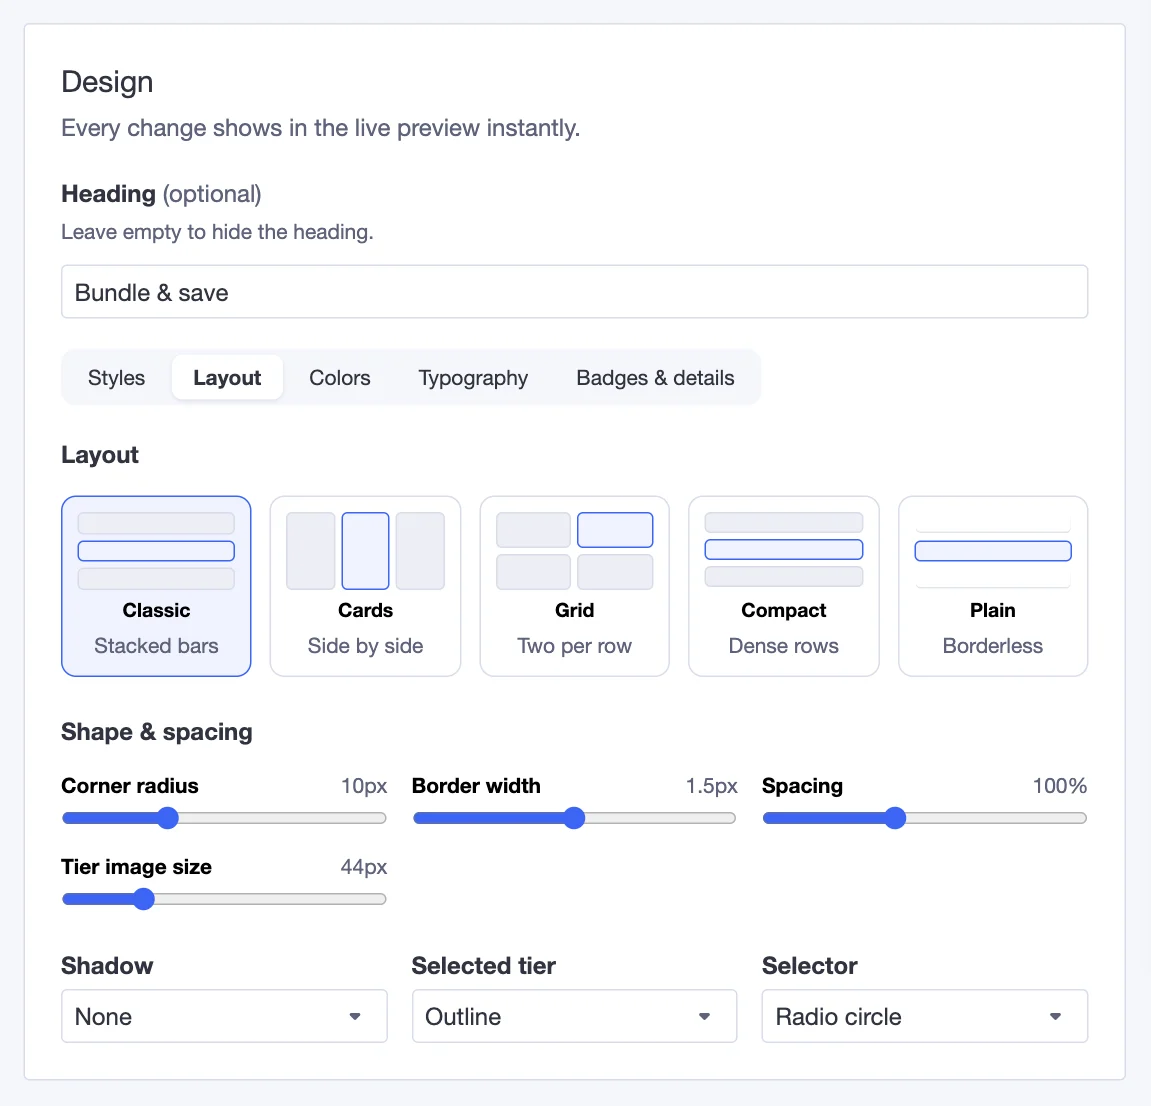
- Layout — how the tiers are arranged:
- Classic — stacked bars (the most familiar).
- Cards — side by side, great for 2–3 tiers.
- Grid — two per row, good for 4+ tiers.
- Compact — dense rows that take less space.
- Plain — borderless until selected; blends into minimal themes.
- Shape & spacing — corner radius, border width, spacing between tiers, and the size of tier images.
- Shadow — none, soft or lifted.
- Selected tier — how the chosen tier stands out: an outline, a soft glow, or lift with a shadow.
- Selector — a radio circle, a checkmark, or none.
Colors
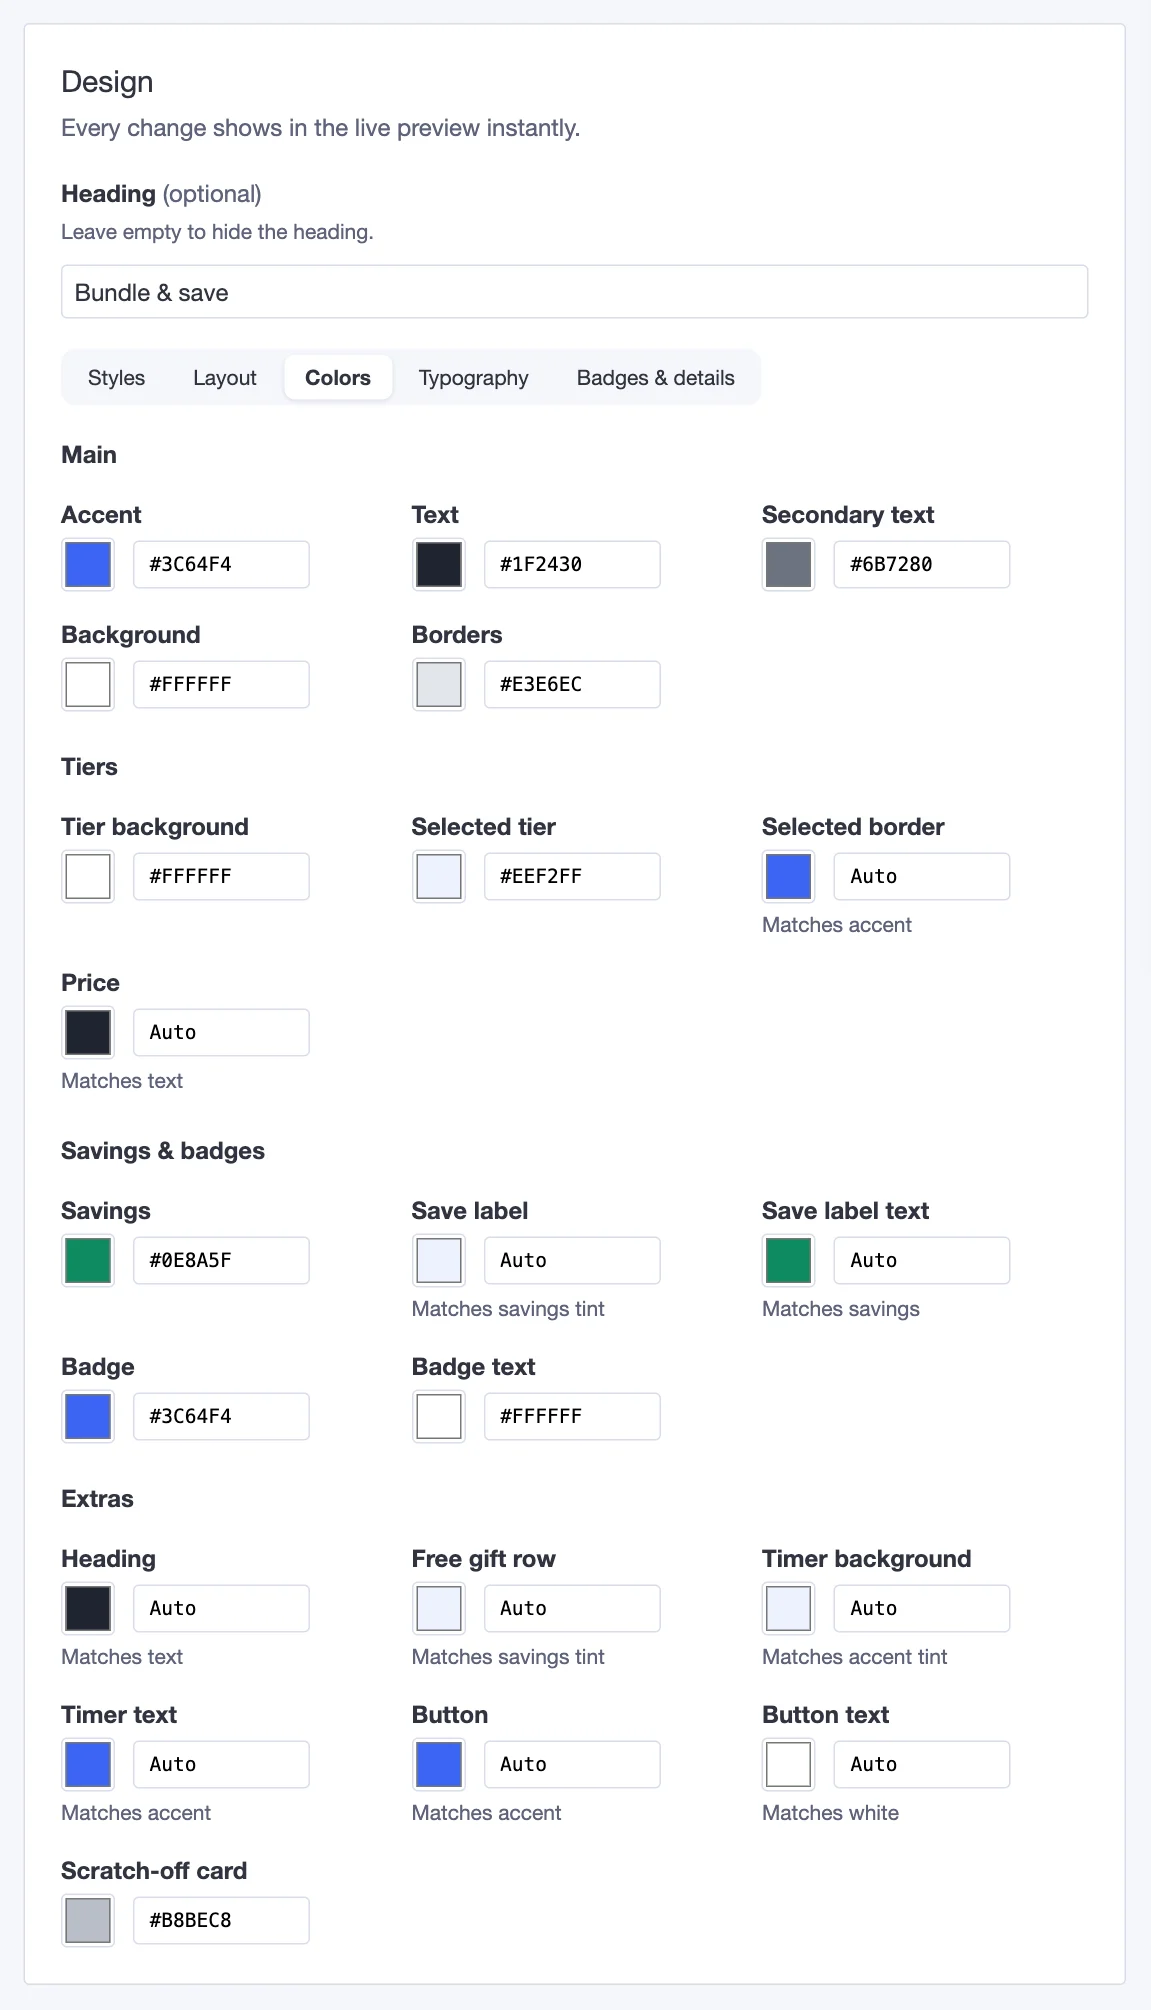
Colors are grouped by where they're used: Main (accent, text, background, borders), Tiers, Savings & badges, and Extras (heading, gifts row, timer, the bundle button, scratch-off card). Click a swatch or type a hex code like #3C64F4.
Many colors start as Auto — they follow another color (shown under the field, e.g. "Matches accent"). Change your accent color and everything set to Auto follows, so a single change can rebrand the whole widget. Type a color into an Auto field to set it yourself.
Typography
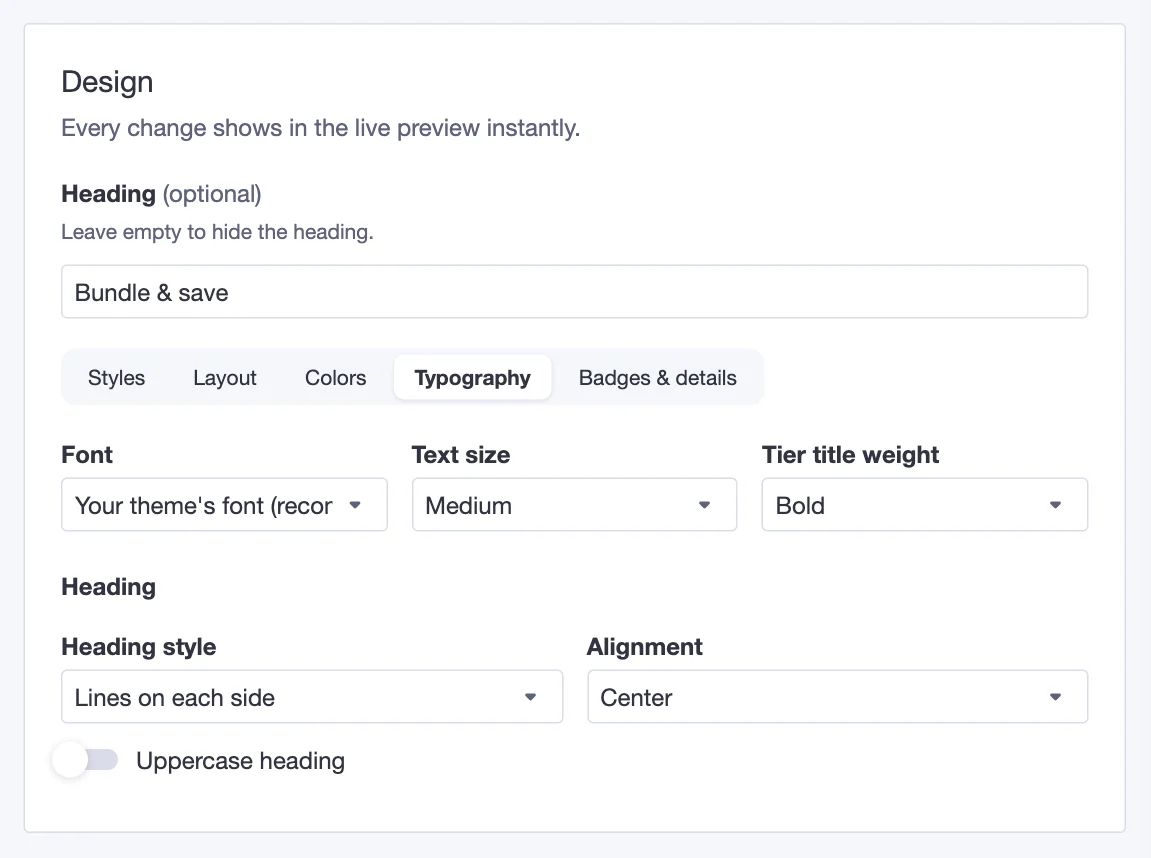
- Font — Your theme's font (recommended, so the widget matches your store), the shopper's System font, or one of eight web fonts (Inter, Poppins, DM Sans, Montserrat, Outfit, Space Grotesk, Nunito or Playfair Display) loaded from Google Fonts.
- Text size — small, medium or large.
- Tier title weight — from medium to extra bold.
- Heading — the heading's style (lines on each side, plain, pill, underlined or banner), alignment, and uppercase on or off.
Badges & details
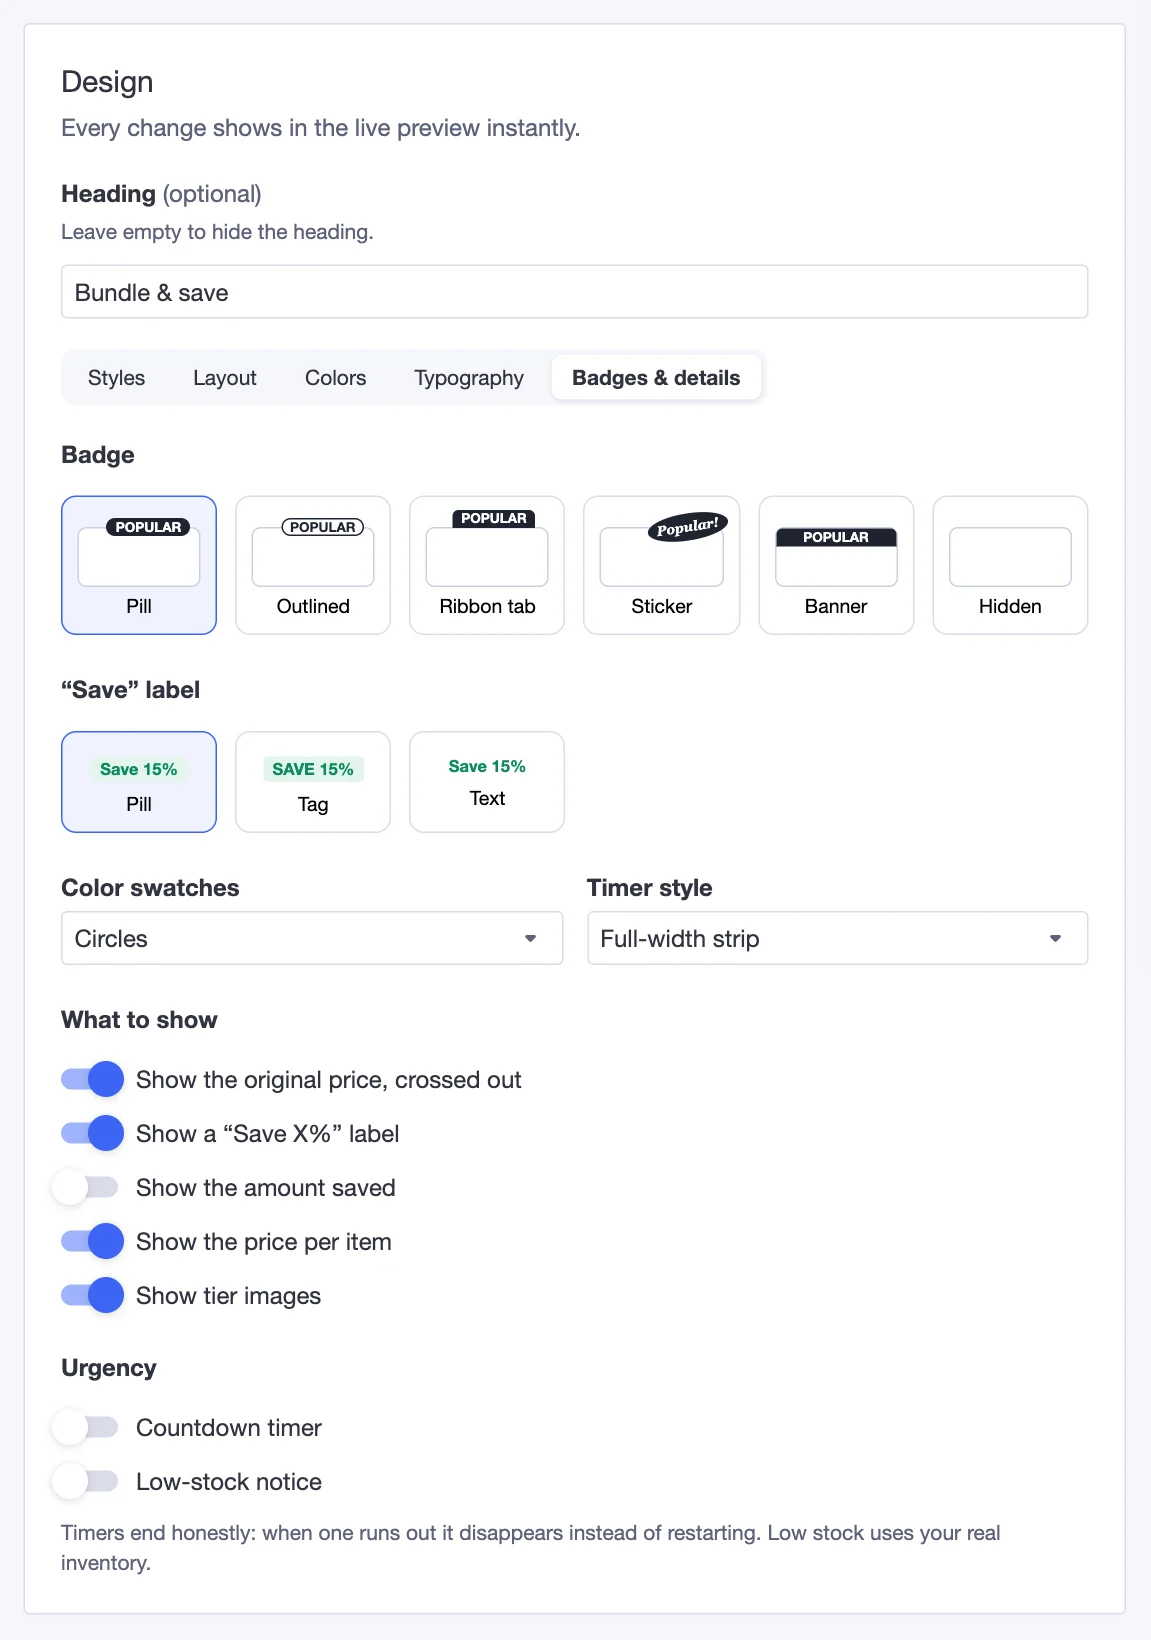
- Badge — how tier badges look: pill, outlined, ribbon tab, sticker, banner, or hidden. (You write the badge text on each tier in Offer → Customize.)
- "Save" label — the "Save 15%" label as a pill, a tag, or plain text.
- Color swatches — circles, rounded squares or squares, for color options in the per-item pickers.
- Timer style — a full-width strip, a pill, or text only.
- What to show — turn on or off: the original price crossed out, the "Save X%" label, the amount saved, the price per item, and tier images.
- Urgency:
- Countdown timer — counts down to the deal's end date (if you scheduled one), or gives each shopper a fixed time (e.g. 15 minutes from their first view).
- Low-stock notice — "Only 7 left in stock" when stock is at or below the number you choose. It uses your real BigCommerce inventory.
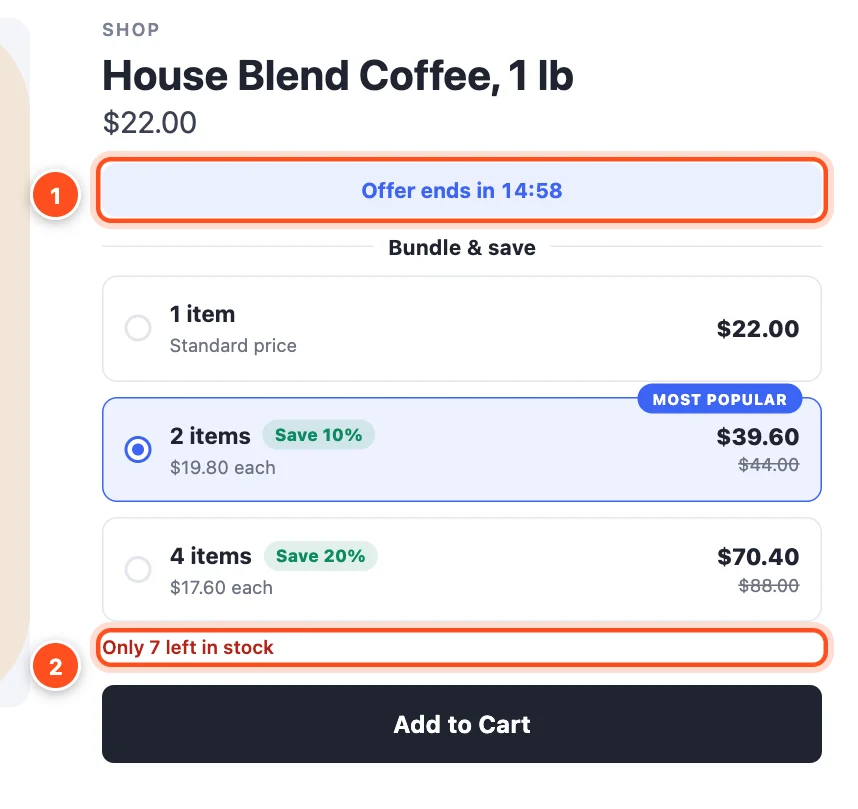
- Countdown timer · 2. Low-stock notice.
Note: Timers end honestly: when one runs out it disappears instead of restarting, and low-stock notices only show when your inventory really is low. Shoppers trust stores that don't fake urgency.
Texts
Below the Design section, Texts lets you change every word shoppers see — handy for a different tone of voice or a store in another language.
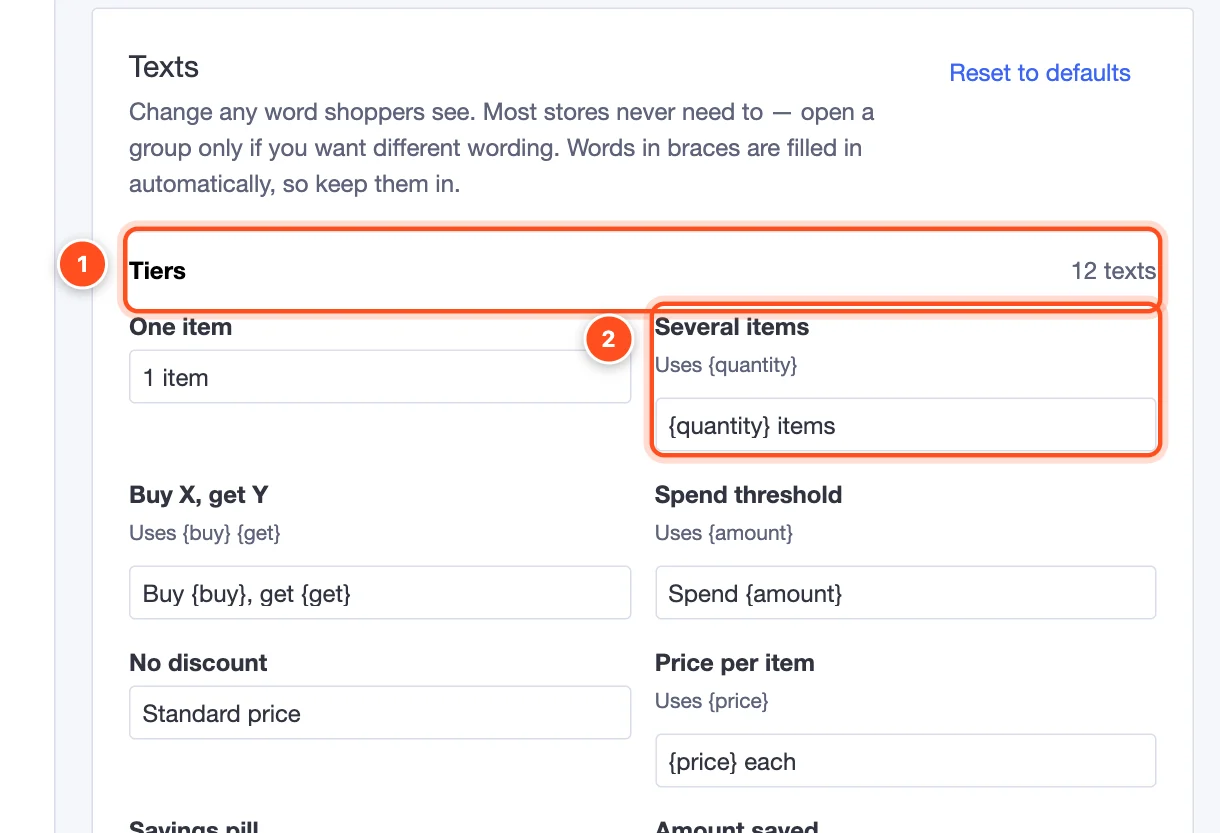
- Texts are grouped into Tiers, Bundles & add-ons, and Options, urgency & cart. Each group says how many texts it has and how many you've changed. Most stores never need to open them.
- Words in braces — like
{quantity}— are filled in automatically, and the field tells you which ones it uses. Keep them in: "{quantity} items" becomes "3 items" on your store.
Click Reset to defaults to undo all your text changes.