Create your first deal
A step-by-step walkthrough — from an empty store to a live "Buy more, save more" deal on your product page.
In this guide you'll create the most popular kind of deal: a quantity break. Shoppers see three options — 1 item, 2 items (save 10%), 3 items (save 20%) — right above Add to Cart. It takes about five minutes.
Step 1: Pick a deal type and a starting point
Go to Deals and click Create deal (or click Quantity breaks on the Overview page).
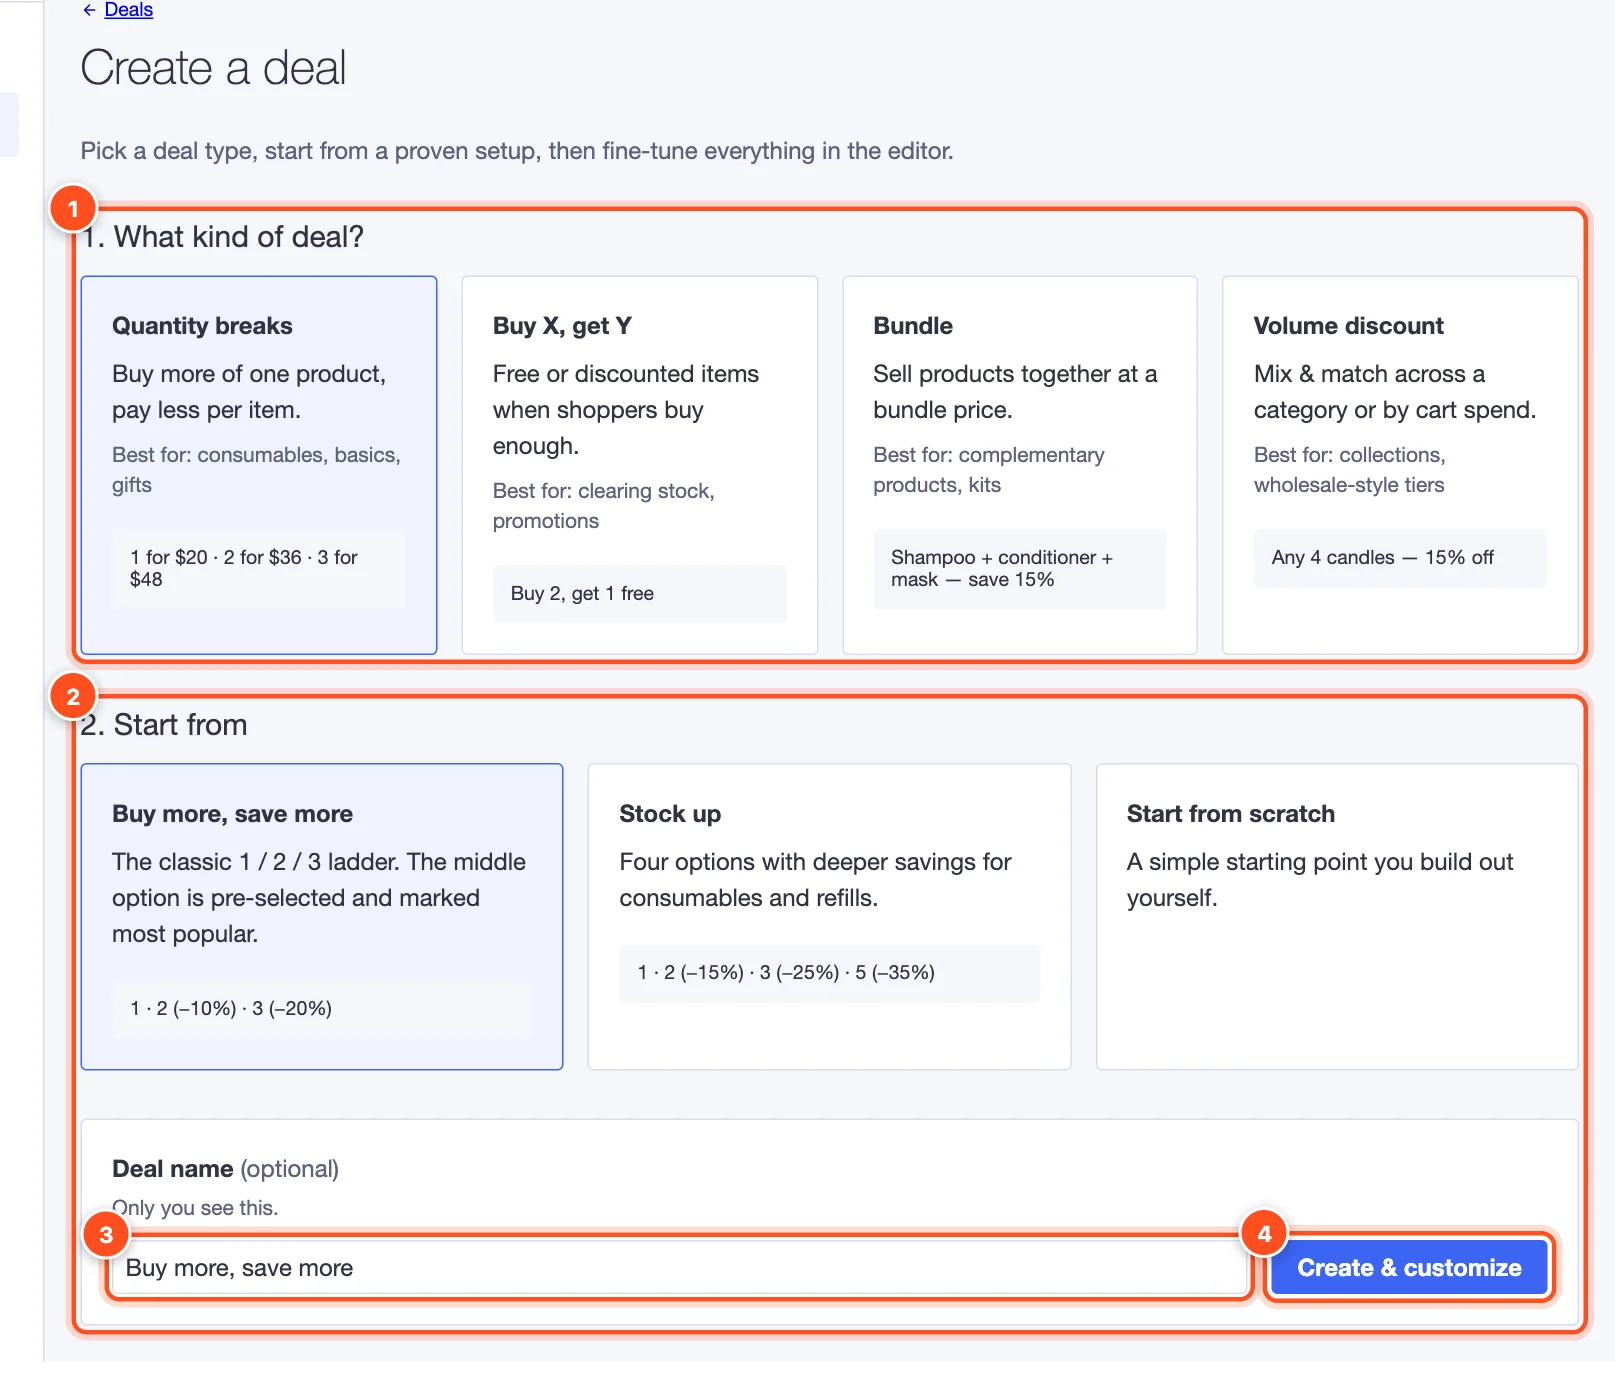
- What kind of deal? Click Quantity breaks. Each card says what the deal does and what it's best for.
- Start from — pick a ready-made setup. Buy more, save more is a proven starting point: 1 / 2 / 3 items with the middle one pre-selected and marked "Most popular". You can change everything later.
- Deal name — only you see this. Give it a name you'll recognise, like "Tees — bundle & save".
- Click Create & customize. The deal is saved as a draft — nothing changes on your store yet.
Step 2: Check the offer
The editor opens on step 1, Offer. The tiers from the starting point are already filled in, and the live preview on the right shows the widget exactly as shoppers will see it.
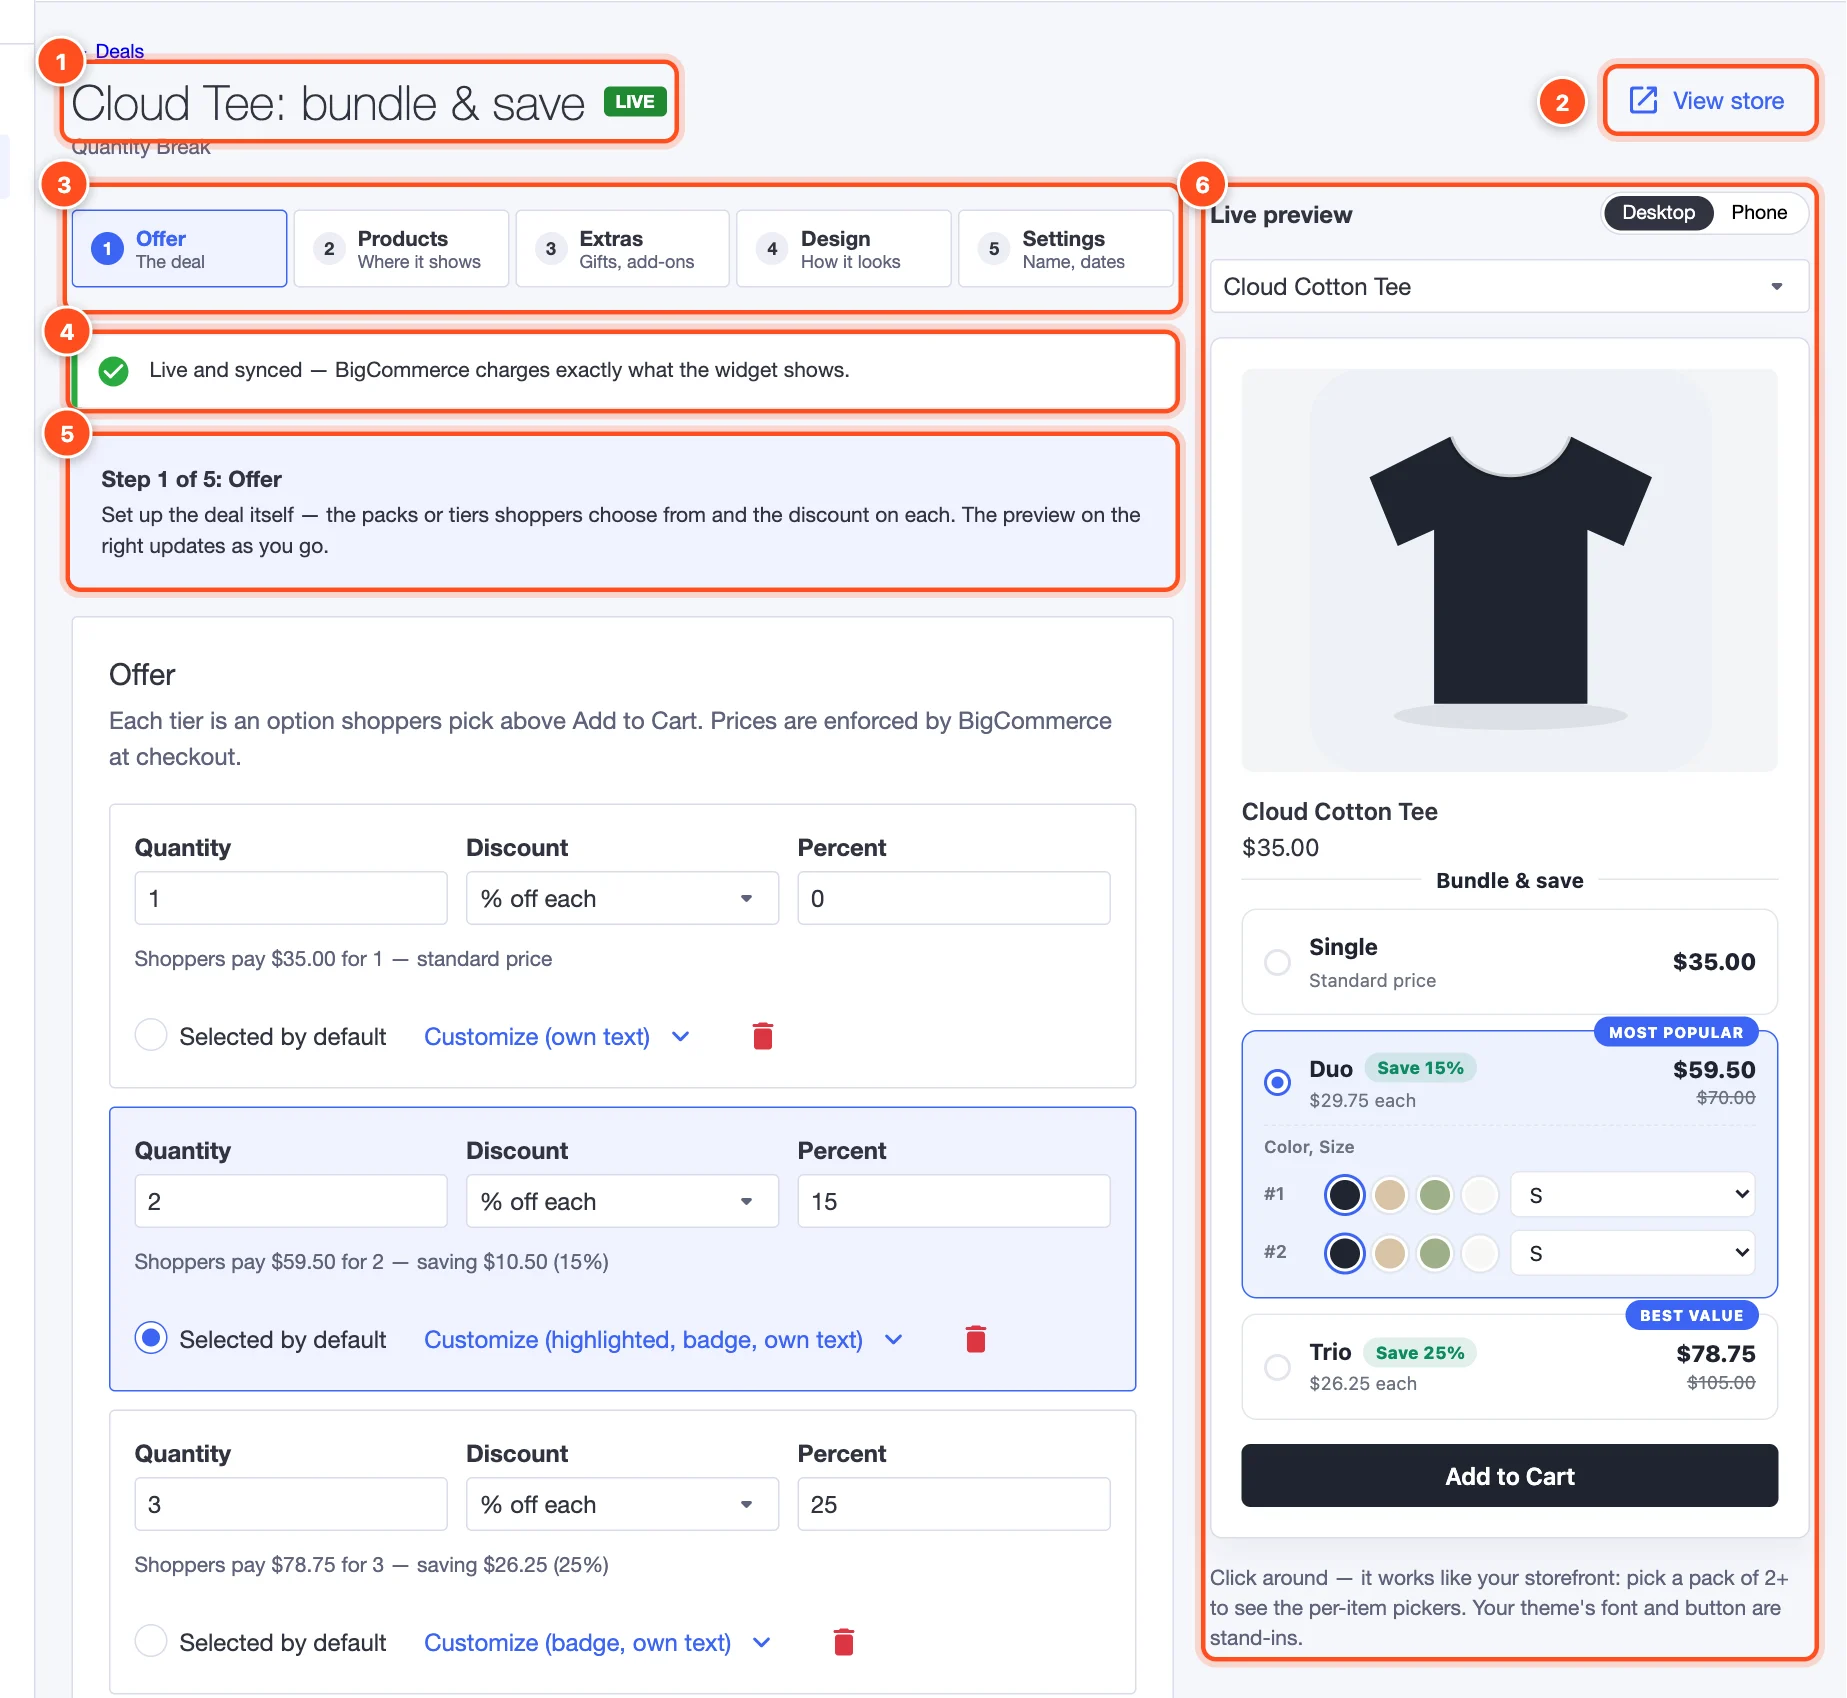
Under each tier the editor spells out what shoppers will pay, e.g. "Shoppers pay $59.50 for 2 — saving $10.50 (15%)". Adjust a quantity or a discount and the preview updates instantly.
Tip: The middle option sells best when it's highlighted. The starting point already does this — that's the "Most popular" badge.
Everything on this step is explained in Step 1: Offer.
Step 3: Choose which products show the deal
Click Next: Products (or the Products tab).
- Choose Specific products and click Add products.
- Search for a product, tick it, and click Add 1 product.
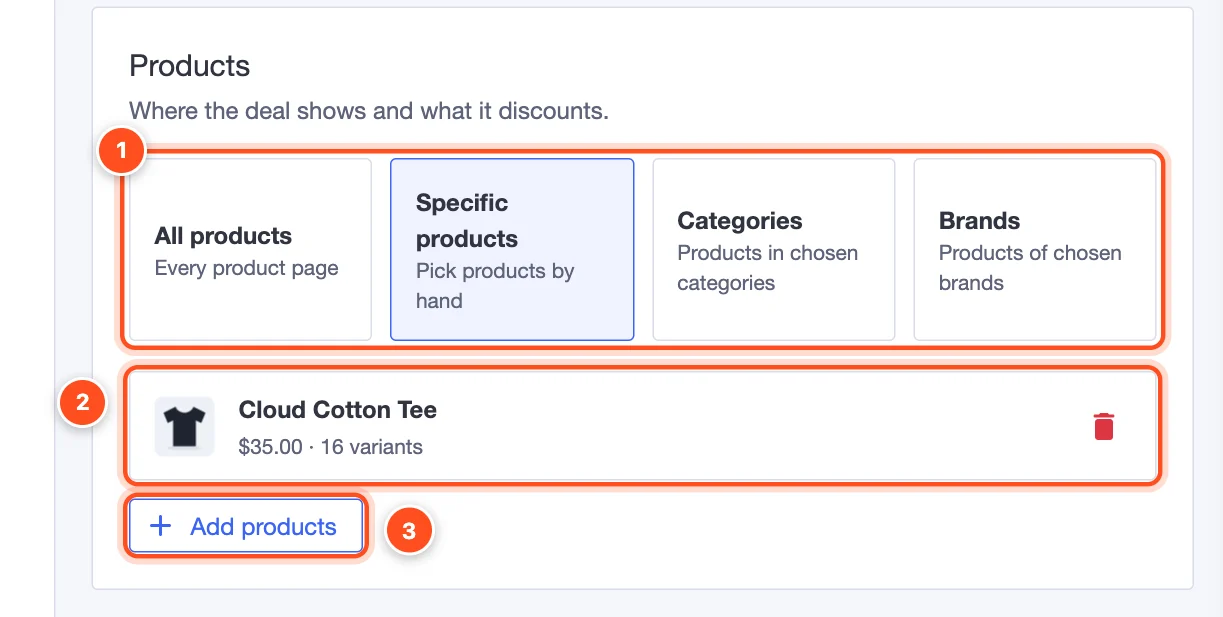
Prefer a whole category or your entire store? Pick Categories, Brands or All products instead. Details in Step 2: Products.
Step 4: Pick a style
Click Next: Extras if you'd like to add free gifts or add-ons (optional — you can skip it), then Design. Click any style in the gallery and watch the preview change. Pick the one that fits your store best.
Step 5: Publish
Click Publish at the bottom right. Within a minute or two the editor shows:
Tip: Live and synced — BigCommerce charges exactly what the widget shows. That green message means the deal is live on your storefront and the discount is set up at checkout.
Step 6: See it on your store
Open one of the products you chose on your storefront. The deal appears right above your Add to Cart button. Pick 2 items, add to cart, and you'll see the discount in your cart.
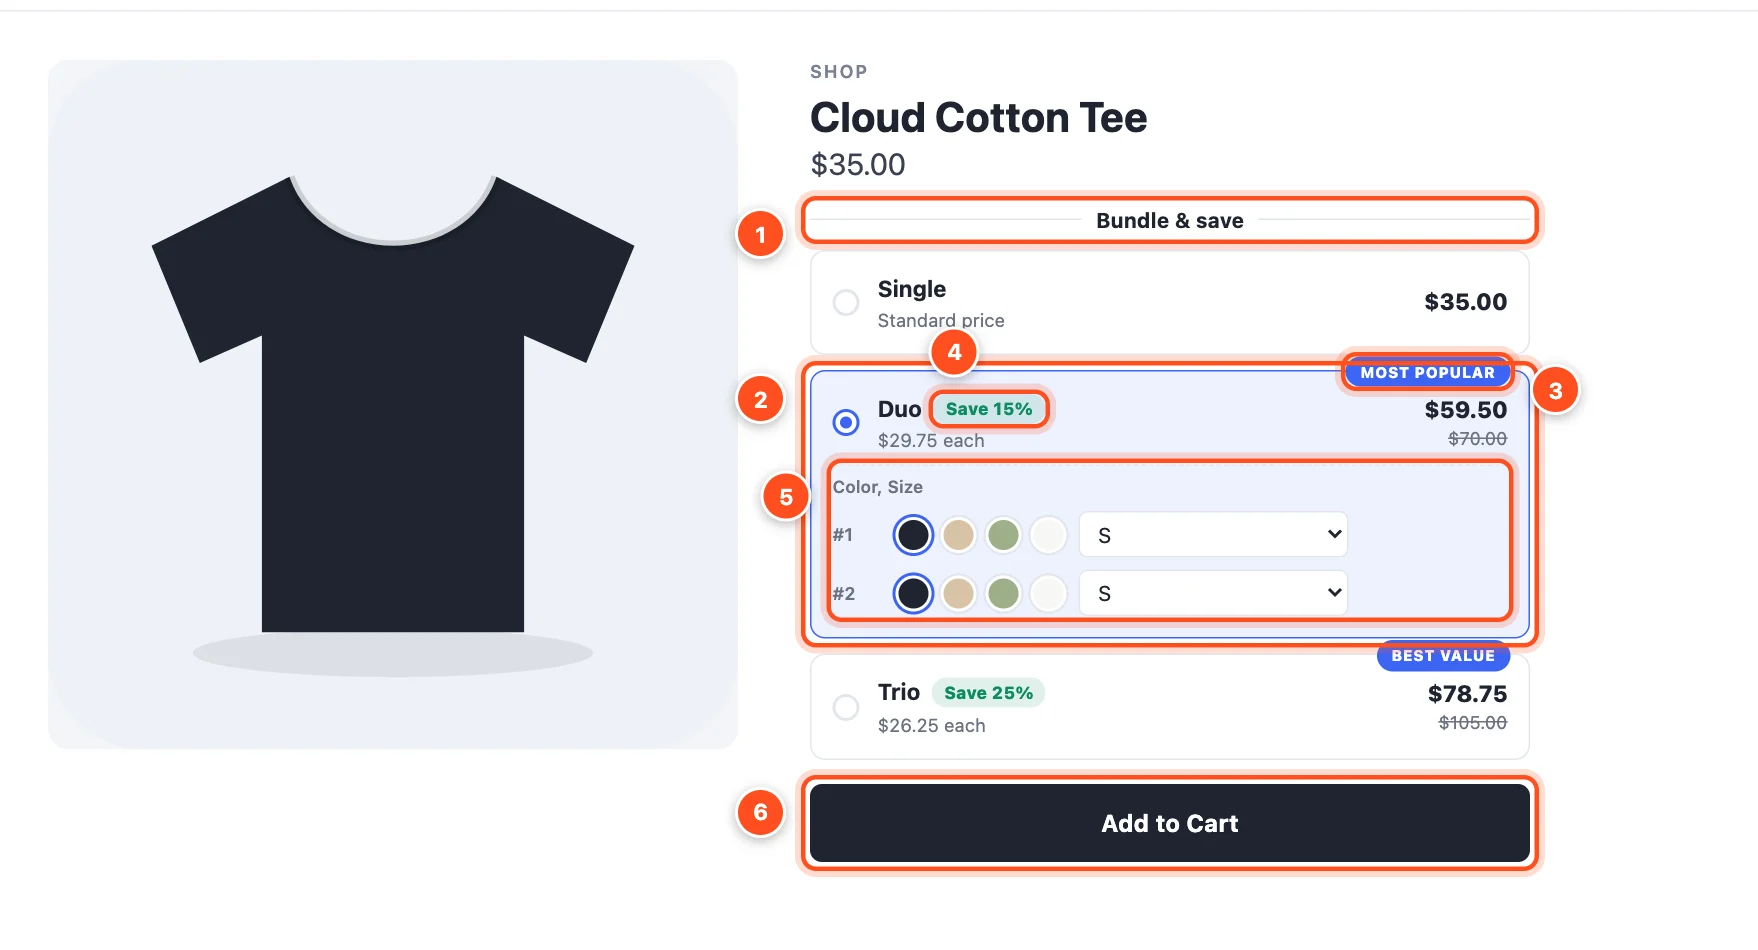
Note: Don't see it yet? Changes can take up to 5 minutes to reach your storefront. If it still doesn't show, see Troubleshooting.
What's next
- Make the deal more tempting with free gifts and add-ons.
- Let shoppers choose a size and color for each item — it's on by default; see Shopper choices.
- Once you have a few days of sales, read your analytics and try an A/B test.